MediaStorm Guide to Fixing Missing Waveforms

This article is part of a series of posts with tips and tricks from our producers’ experience working with Adobe Premiere Pro CC after years of working in Final Cut Pro. To read more about why we made the switch, check out this post.


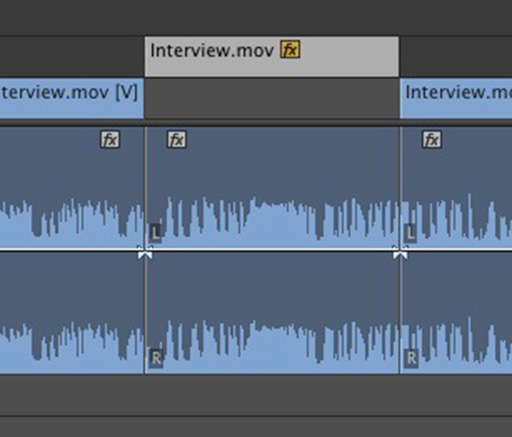
Last week, while editing the epilogue for Jeff Hutchen’s Travel Anonymous, my Premiere Pro audio waveforms mysteriously disappeared.

If you find yourself in a similar predicament, here’s how to get them back.

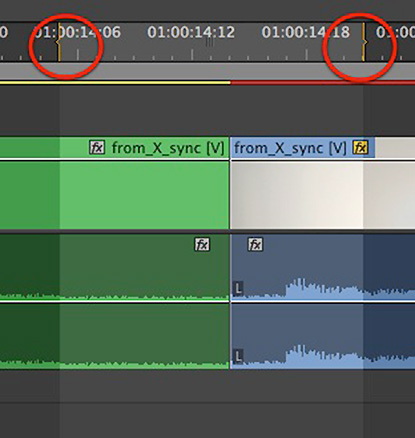
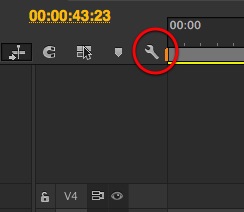
First, make sure your audio waveforms are turned on. You can find this option under the wrench icon in your timeline.

(more…)

Continue ReadingMediaStorm Guide to Fixing Missing Waveforms

MediaStorm Guide to Super Fast Logging with Premiere Pro and Keyboard Maestro

This article is part of a series of posts with tips and tricks from our producers’ experience working with Adobe Premiere Pro CC after years of working in Final Cut Pro. To read more about why we made the switch, check out this post.


In this post, I’ll show how to drastically increase your logging speed in Premiere Pro CC using Stairway Software’s $36 Keyboard Maestro.

Keyboard Maestro is a macro utility. When a user inputs a single keyboard shortcut, Keyboard Maestro will respond with a series of predefined actions. For our purposes, we’ll enter one Premiere Pro keyboard shortcut, and Keyboard Maestro will respond with a string of additional shortcuts.

It’s a powerful solution to repetitive tasks.

What follows is a bit involved but trust me, in the end, you’ll be saving loads of time.

The Premiere Pro Way

First, some background, at MediaStorm we raise video one channel to indicate a selection.

(more…)

Continue ReadingMediaStorm Guide to Super Fast Logging with Premiere Pro and Keyboard Maestro

MediaStorm Guide to Creating Multi-Camera Sequences in Premiere Pro, Part 1

This article is part of a series of posts with tips and tricks from our producers’ experience working with Adobe Premiere Pro CC after years of working in Final Cut Pro. To read more about why we made the switch, check out this post.


If you record interviews with more than one camera–and you should if you can–you’ll need to sync your footage before you begin to edit.

Premiere Pro CC provides a method to do this but only if every clip contains a sync marker such as a hand clap. In reality, clapping each time you stop and start your camera is not practical, especially during an interview.

Correction: Premiere Pro CC does allows you to sync clips via audio waveforms, but I’ve found it a cumbersome process that does not often work.

Instead, MediaStorm uses Red Giant’s PluralEye’s 3.0. It’s available for $199 with a fully-functional 30-day trial.

Adding Clips

Launch PluralEyes.

Unlike previous versions, PluralEyes is now an independent application.

Select the Camera 1 tab on the right side. (more…)

Continue ReadingMediaStorm Guide to Creating Multi-Camera Sequences in Premiere Pro, Part 1

MediaStorm Guide to Quickly Replacing Files in Premiere Pro

Here’s a handy tip for easily replacing assets in the Premiere Pro timeline. First, locate a photograph or video clip on your timeline that you’d like to replace. Then, in your Project Browser (Shift–1) locate your replacement file. As you drag the new item to the timeline, hold down the option key. Still holding the option key, hover over the asset in the timeline you’d like to replace. When you see a red box around the old clip, release the mouse. The timeline will instantly update with your new selection. What’s great about this shortcut is that the new asset will still possess attributes of the old one like cropping and effects, including color correction. This makes it particularly useful for updating RAW photographs with toned ones. Just make sure that both images are the same size. [1] For information on MediaStorm’s photography workflow check out the 40-page Aperture document included with…

Continue ReadingMediaStorm Guide to Quickly Replacing Files in Premiere Pro

MediaStorm Guide to Copy and Pasting a Clip Range in Premiere Pro

This article is part of a new series of posts with tips and tricks from our producers' experience working with Adobe Premiere Pro after years of working in Final Cut Pro. To read more about why we made the switch, check out this post. Today's post was written by MediaStorm producer Eric Maierson. A neat new feature in Premiere Pro is the ability to copy and paste a range of clips (or one clip) without first having to use the Razor Tool (C). To do this simply mark an In (I) and Out (O) on your timeline. Then, Copy (Command-C) and Paste (Command-V). Super easy, super helpful. Note that if a clip is already selected, you’ll simply copy and paste whatever is highlighted, not the range indicated by in and out marks. Use Command-Shift-A to first deselect all clips. To learn more about how our producers are using Adobe Premiere Pro see…

Continue ReadingMediaStorm Guide to Copy and Pasting a Clip Range in Premiere Pro