MediaStorm Guide to Using the MediaStorm Asset Parser

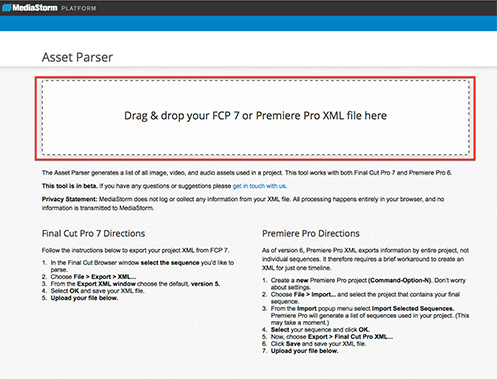
This article is part of a series of posts with tips and tricks from our producers' experience working with Adobe Premiere Pro CC after years of working in Final Cut Pro. To read more about why we made the switch, check out this post. Knowing exactly what images and videos are used in the production of a film is a critical part of the MediaStorm workflow. We need this information in order to know which low-res footage needs to be purchased then swapped out with licensed hi-res footage, as well as which images must be toned then replaced in the timeline. Unfortunately, there is no easy way to do this in either Premiere Pro or Final Cut Pro 7. So MediaStorm built the Asset Parser. Using the parser is easy. First, you’ll need to export an XML file from your editing software. In Premiere Pro, make sure your final sequence is selected…

Continue ReadingMediaStorm Guide to Using the MediaStorm Asset Parser

MediaStorm Guide to Using Adobe Lightroom with Premiere Pro

This article is part of a series of posts with tips and tricks from our producers’ experience working with Adobe Premiere Pro CC after years of working in Final Cut Pro. To read more about why we made the switch, check out this post.


Adiós Aperture

Apple recently announced its plans to retire both Aperture and iPhoto. The company will create one unified application, titled Photos, that will be part of OS X Yosemite.

While Yosemite will continue to support Aperture, as well as provide an upgrade path for Photos compatibility, development of Aperture will cease. (It’s worth noting that the last major upgrade to Aperture was version 3.5, released in October 2013.)

Aperture users are left with three basic options:

  • Continue to work in Aperture, in the same manner that some still use Final Cut Pro 7.
  • Adopt Photos in to their workflows when it becomes available.
  • Use an alternative application like Adobe’s Lightroom.

While some suggest that Photos will be a powerful replacement for iPhoto and Aperture, Macworld author David Sparks states, “The desktop Photos app likely won’t offer all the power that currently exists in Aperture; I’m certain its photo-alteration tools will take a hit.”

I hope that’s not the case. Nevertheless, MediaStorm is now considering adopting Lightroom in to our post-production workflow.

(more…)

Continue ReadingMediaStorm Guide to Using Adobe Lightroom with Premiere Pro

MediaStorm Announces Post-production Workflow for Premiere Pro

Here it is: a year-and-a-half after our big switch from Final Cut 7 to Premiere Pro, we are proud to announce the release of MediaStorm’s Post-production Workflow for Adobe Premiere Pro. In more than 150 steps, you’ll learn to organize and edit your projects with the same proven efficiency we’ve used time and again–we focus on organizing first so that creativity is not hampered once editing begins. This workflow is a complete guide to working in Premiere Pro: from importing material through final output and archiving. The underlying principal of the MediaStorm process is elimination. Whether it be pictures, interviews or b-roll, our guiding rationale is to save the good stuff and take away the rest. These steps emphasize the importance of making a copy of your work at each stage so that should you need to access previously discarded material, you have a clear and quick path back to needed material.…

Continue ReadingMediaStorm Announces Post-production Workflow for Premiere Pro

MediaStorm Guide to the Slip Tool

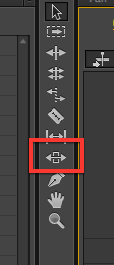
This article is part of a series of posts with tips and tricks from our producers' experience working with Adobe Premiere Pro CC after years of working in Final Cut Pro. To read more about why we made the switch, check out this post. One tool I often overlook when editing is the slip tool. My buddy Tim McLaughlin reintroduced me to its power last week. The slip tool allows you to change the in and out point of a single clip without affecting it’s duration or the duration of adjoining clips. Your project length stays the same. Activate the slip tool with either the shortcut key Y or by clicking on its icon in the toolbar. Next, hover over a video clip and you’ll see that your cursor change to the slip icon. Hold down your mouse and drag forward or backwards inside the clip, don't move the clip itself. You’ll…

Continue ReadingMediaStorm Guide to the Slip Tool

MediaStorm Guide to Creating Multi-Camera Sequences in Premiere Pro, Part 2

This article is part of a series of posts with tips and tricks from our producers’ experience working with Adobe Premiere Pro CC after years of working in Final Cut Pro. To read more about why we made the switch, check out this post.


In the first part of this tutorial, I showed you how to sync multiple camera angles and audio sources using Red Giant’s $199 PluralEye’s 3.0. After you’ve imported the XML file generated by PluralEyes into Premiere Pro CC and your tracks are in sync, it’s time to create a multi-camera sequence.

First though, because PluralEyes offers no audio configuration options like stereo vs.mono, or which tracks to duplicate for stereo pairs, you’ll need to make sure your audio is set up properly. See the screencast MediaStorm Guide to Audio Configuration for assistance.

As a general rule, I use the better audio source and double it so I now have a stereo pair.

MULTI-CAMERA SEQUENCE

A multi-camera sequence appears in your timeline as one clip, but bundles multiple camera angles together so that you can easily see all available options as you edit.

To create a multi-camera sequence, first create a new empty sequence (Command-N). Next, drag your synced sequence from the Project window into this one. Putting one sequence inside another is referred to as a nested sequence.

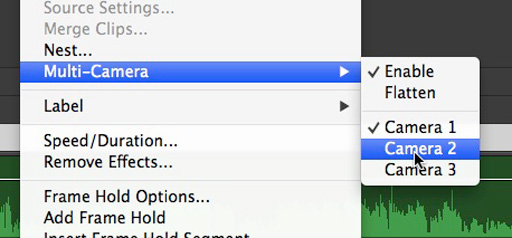
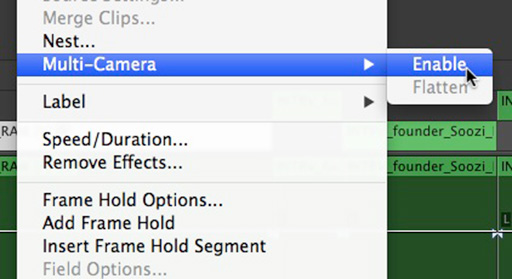
Rename your new sequence ProjectName_InterviewName_multiclip_RAW. Still in the timeline, right-click your sequence and select Multi-Camera > Enable.

(more…)

Continue ReadingMediaStorm Guide to Creating Multi-Camera Sequences in Premiere Pro, Part 2