
This article is part of a series of posts with tips and tricks from our producers’ experience working with Adobe Premiere Pro CC after years of working in Final Cut Pro. To read more about why we made the switch, check out this post.
Knowing exactly what images and videos are used in the production of a film is a critical part of the MediaStorm workflow.
We need this information in order to know which low-res footage needs to be purchased then swapped out with licensed hi-res footage, as well as which images must be toned then replaced in the timeline.
Unfortunately, there is no easy way to do this in either Premiere Pro or Final Cut Pro 7.
So MediaStorm built the Asset Parser.
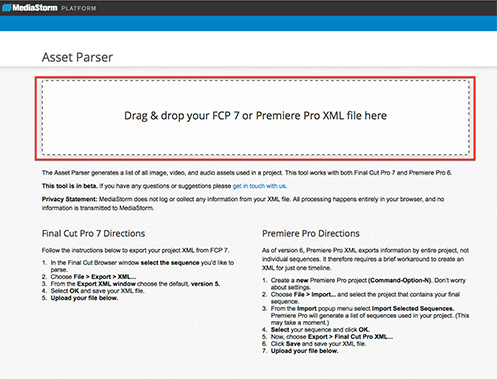
Using the parser is easy.
First, you’ll need to export an XML file from your editing software.
In Premiere Pro, make sure your final sequence is selected in the Project window.
Then, choose File < Export < Final Cut Pro XML…
Similarly, in Final Cut Pro 7, select your desired sequence then from the File menu select Export > XML…
Next, point your browser to: https://player.mediastorm.com/tools/asset-parser
Drag your XML file over the dotted rectangle.

You’ll soon see a list of the different assets used in your project: all of the images, video and audio.