MediaStorm Guide to Nudging Audio in Premiere Pro 2014
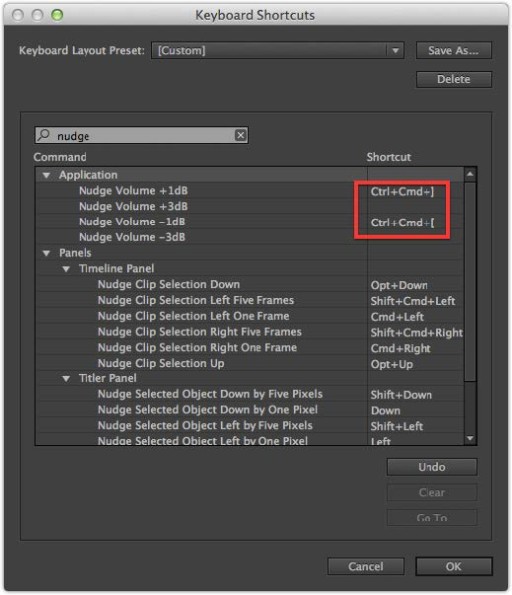
This article is part of a series of posts with tips and tricks from our producers' experience working with Adobe Premiere Pro CC after years of working in Final Cut Pro. To read more about why we made the switch, check out this post. A quick way to change your audio levels in Premiere Pro is to select a clip in the timeline and use the closed bracket ( ] ) to raise the volume or the open bracket ( [ ) to lower it. You can easily alter a group of clips this way by simply lassoing them first. Unfortunately, this method does not work in Premiere Pro CC if any of the audio contained key frames. This was a real limitation. Thankfully, with the introduction of Premiere Pro 2014, you can now nudge key-framed audio with a user-defined shortcut key. From the Premiere Pro menu select Keyboard Shortcuts… (Option-Command-K) Search…