
This article is part of a new series of posts with tips and tricks from our producers’ experience working with Adobe Premiere Pro after years of working in Final Cut Pro. To read more about why we made the switch, check out this post.
This great tip comes from Jonathan Grubbs via Josh Meltzer.
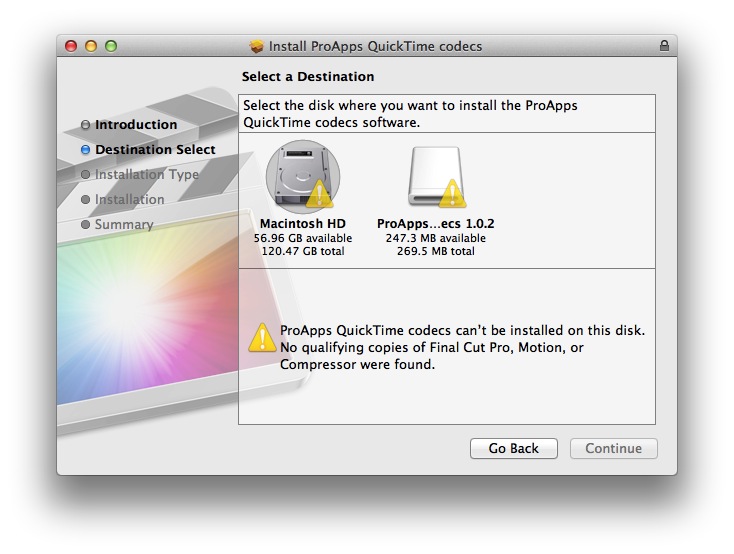
Should you install Premiere Pro on a machine without Final Cut Pro, you will find your machine missing some key codecs such as ProRes. The solution is straightforward.
Quit Premiere Pro.
Download the ProApps Quicktime Codecs from the Apple site.
You’ll receive an error if you try to install the codec package without FCP on your system.

The workaround is to first install the free application unpkg.
Drag the ProAppsQTCodecs.pkg file on to the unpkg icon.
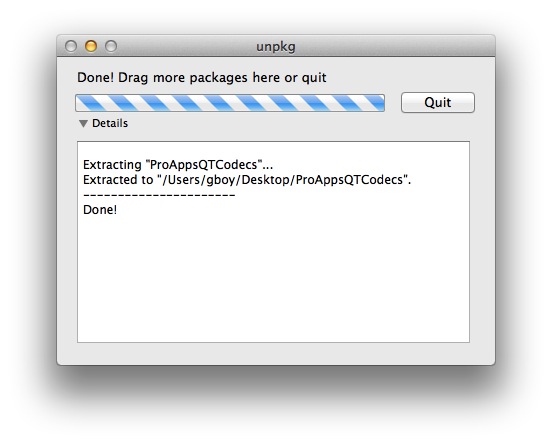
Unpkg wil extract the components to your desktop.
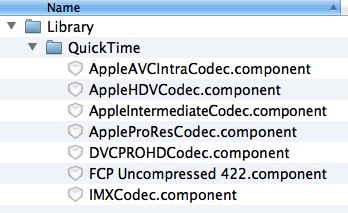
In the Finder select Go > Go to Folder… (Command-Shift-G). Enter /Library/QuickTime.
Drag the component files in to this folder. You’ll need to click Authenticate and enter your root password.
Open Premiere Pro and the new codecs will be available.
To learn more about how our producers are using Adobe Premiere Pro see our other blog posts on the topic. Also, follow our producers’ twitter feed @PrProShortcuts for Premiere shortcuts.
To learn more about our production style, you can purchase a copy of our Post-production Workflow. Readers who purchase our current Final Cut Pro and Aperture workflow automatically receive the Premiere workflow when it is released.
MediaStorm offers several online and in-person training opportunities at mediastorm.com/train.
Have you made a recent switch in your editing software? Let us know about it in the comments below.