One of the questions I’m asked most frequently about Final Cut is, “When do I use Apple’s ProRes 422 codec?”
To tackle this question it’s first necessary to understand a few things about codecs.
Shooting video is a very intensive digital capture process. It requires cameras to capture lots of information in a short amount of time. To handle so much raw data, most cameras need to compress what they capture. A codec is essentially a compression scheme, a way to encapsulate so much material into a containable format.
Standard DV footage, for instance, uses a compression scheme referred to as the DV codec. Similarly, HD footage — 1080i60, 1080p, etc. — uses the HDV codec.
Codec takes its name from “encoder” and “decoder” since your computer must now decode the encoded file during playback.
When you create a new sequence in Final Cut, you are building what will become a new movie. Thus, you need to define what kind of codec you’ll be using when it’s played back. This is where you need to decide if ProRes 422 is the proper choice.
The answer is actually quite simple.
If you will be using only one kind of video in your project, HDV 1080p for example, then you should use 1080p’s native codec, HDV, for your sequence. If you’re using only DV footage, set your sequence codec to DV.
On the other hand, if your project includes more than one format — both DV and HDV material for example — then you’ll need to set your FCP sequence codec to ProRes 422.
The ProRes 422 codec is so powerful that it can contain two or more other codecs within it, without requiring extra rendering. It’s a truly remarkable ability.
For a technical description of how to set up your sequence’s codec, see Tips from the MediaStorm Final Cut Pro workflow.
In Final Cut 7, the latest version, Apple introduced three new flavors of 422. About 90 percent of the time, you’ll use the standard ProRes 422. But if you’d like more information on the other options, see Final Cut Pro 7. Expanded ProRes Family.
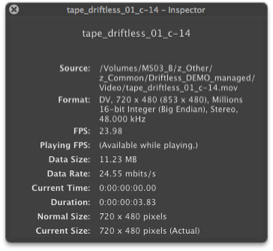
Finally, if you’re unsure of your file’s codec, open it in QuickTime, then use the shortcut key command-I to open the application’s Movie Inspector window.

There you’ll see all kinds of metadata including the clip’s length and file size as well as the codec it uses.
Learn more about our approach to producing multimedia by purchasing MediaStorm’s Post-production Workflow. Spanning more than 200 steps, the workflow covers every phase of editing, from organizing and editing assets in Final Cut Pro 7 through backing up and archiving your project. The workflow includes exclusive access to our Aperture Workflow and our Final Cut Asset Parser. Learn more about MediaStorm’s Post-production Workflow.
