This article is part of a series of posts with tips and tricks from our producers’ experience working with Adobe Premiere Pro CC after years of working in Final Cut Pro. To read more about why we made the switch, check out this post.
Recording voice-overs in Premiere Pro 2014 is both easy and straightforward.
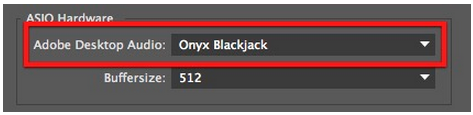
First, you’ll need to connect your audio interface. From the Premiere Pro menu select Preferences > Audio Hardware.
I use the Mackie Onyx Blackjack 2×2 USB interface with a Heil Pr–40 microphone.
Therefore, from the Audio Hardware preference window, I select Onyx Blackjack. Depending on the input source, your options may vary.
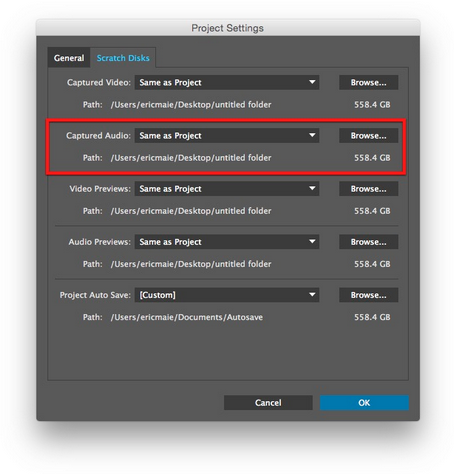
Next, set the destination for recorded audio. From the File menu, select Project Settings > Scratch Disks… Change the Captured Audio destination to a folder where you’d like to store your voice-overs.

Open the Audio Track Mixer using the Window menu.
From the fly-out menu select Meter Input(s) Only.
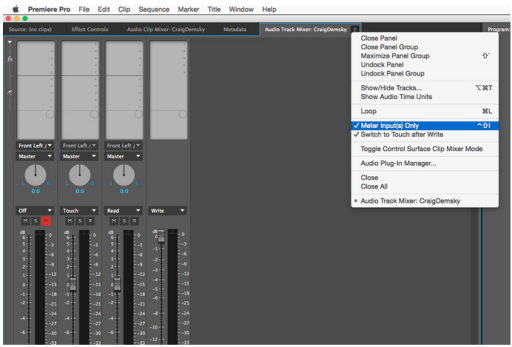
This will ensure that your audio recording does not also contain audio from your project, that the VO recording is clean.
In the Audio Track mixer select the track you’d like to record to by pressing the ‘R’ record button.

Press the record circle at the bottom of the window.
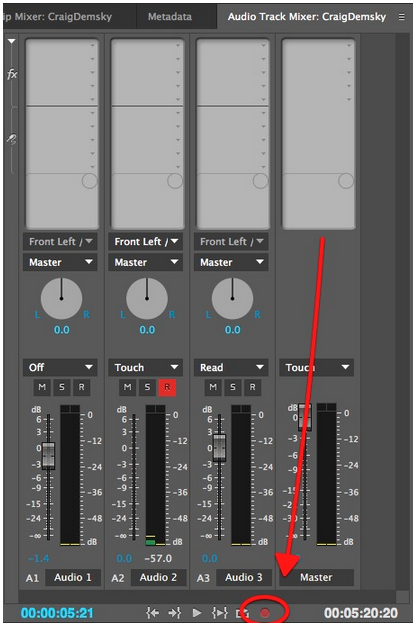
Finally, press the adjacent play button or the spacebar to begin recording.
Premiere Pro will automatically import your new VO to the timeline as well as import it into the project.
Note that in order to record voice-over, it’s necessary to have assets already in your timeline. In my testing, you can not record to an empty sequence.
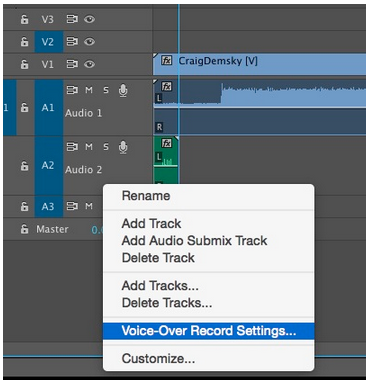
Also worth investigating are the Voice-Over Recording Settings… that are available by right-clicking an audio channel in the timeline.